I originally wrote this post weeks ago, but didn’t finish it. Ephraim and I have both been hard at work on the project and the blog has fallen by the wayside. At the time of publishing this post, we’re done with the empenage kit, save for a few quick steps. I’ll be writing new posts to cover that progress, but for now the post covers progress as of a few weeks ago.
Fuselage
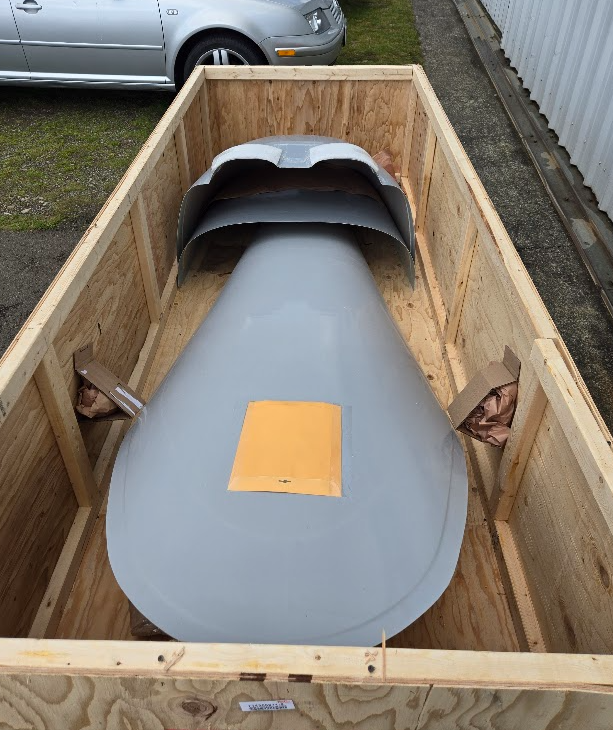
It’s here and unpacked!
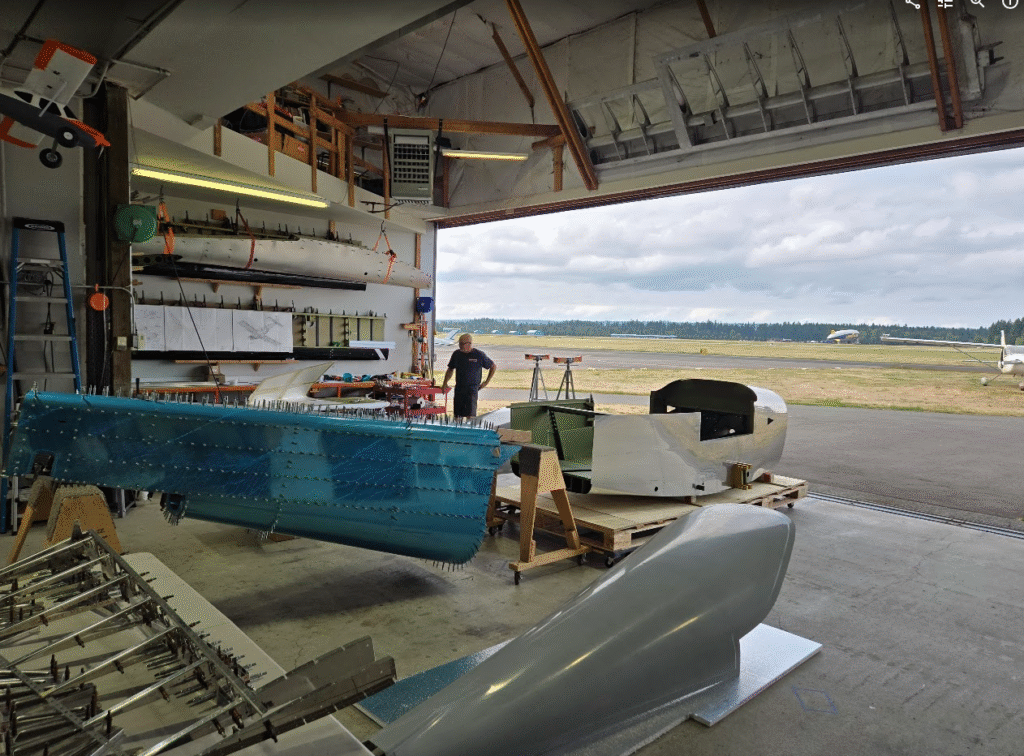
The fuselage kit arrived a week or so ago, but I was too busy to come check it out until earlier this week. It looks nice! It’s nice to finally have a tangible visual aid for the full assembly. Obviously, the assembly manual should convey the full story, but it’s a little clumsy to search through them to find small details. Much easier to just look at the real thing.
Elevators
I started this kit as a novice to homebuilding/sheet metal work. Initially, Ephraim basically managed the assembly steps and broke things down into small tasks like deburring, cutting, countersinking, etc etc. This let me get comfortable with the actual manufacturing processes without worrying about the kit building steps themselves. I feel like I’m now comfortable with the common processes, and have naturally moved onto to following the assembly manual on my own while Ephraim works on unrelated tasks in parallel (for now, that’s final drilling the tailcone).
Feeling comfortable enough to follow the plans coincided with the start of the elevators. I asked Ephraim if starting my own section by owning the elevators seemed like a decent idea, and he enthusiastically agreed. I started building up both elevators in parallel, but we were already short on #40 clecos that day, and the tailcone using a ton of them wasn’t helping. I realized I’d only have enough clecos on hand to do one elevator at a time, and for whatever reason, I picked the right elevator to continue building up. This was a poor choice. The plans show the left elevator, and then mention to mirror it for the right. This meant that for the elevator I was building up, I had to mentally mirror all the images in the plans. This was a major lesson learned: If you are building up something mirrored, start with the side the plans show.
Otherwise, the elevators start innocuous enough. Same routine of cleco’ing, final drilling, countersinking, trimming, etc as I’ve done elsewhere.
Right elev build up
A “Get Out of Jail Free” card from Ephraim
I had a little bit of difficulty with the control horn. The ribs weren’t being pulled in quite enough so the holes didn’t line up perfectly. Ephraim helped manipulate the structure to get it to agree with the holes in the horn.
I guess I didn’t take pictures of it, but so far my most hated section of the kit are the trim cable anchors in the elevators. The welded nut just feels janky.
Things have been busy just lately, so I haven’t had time to update the blog…
HStab
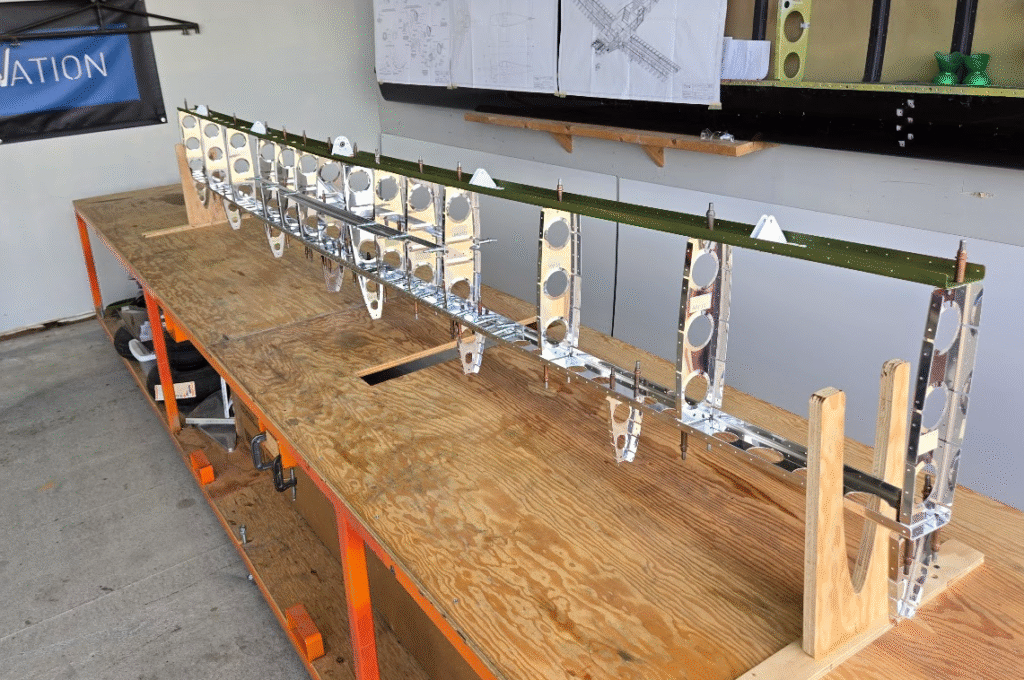
Last Friday, Mark/Ephraim/I assembled the HStab spar to the skin and nose ribs. Ephraim had already riveted the nose ribs by the time I showed up.
Before
Mark and I riveting together
This was my first exposure to driving solid rivets. Mark and Ephraim gave me a tutorial on bucketing and driving solid rivets with some scrap aluminum. After I had driven a line of rivets, we reset with a tutorial on drilling out the rivets I had just installed. After a few iterations of this, it was time to move onto driving rivets into the HStab itself.
Mark drove and I bucked. Ephraim went around the opposite side of the HStab and worked on the same task, solo. Watching Ephraim work at the same pace as Mark and I combined with perfect consistency was pretty impressive.
With the spar done, we ended the day.
Ephraim continued to work without me over the next few days and finished the HStab by himself.
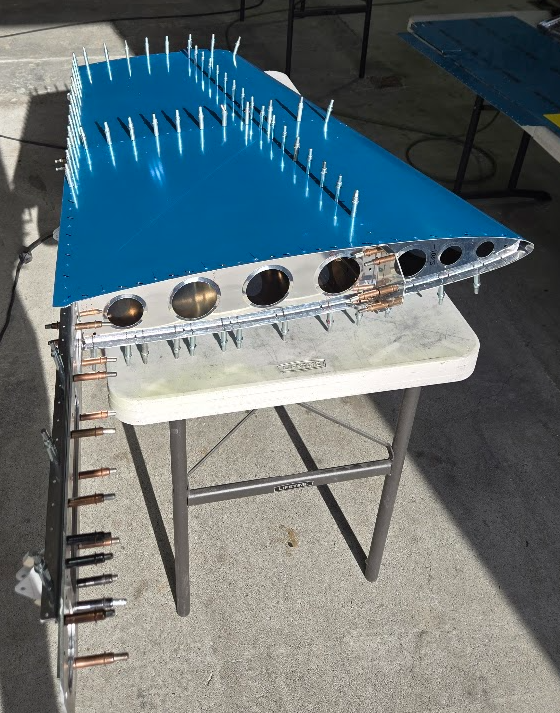
The finished HStab!
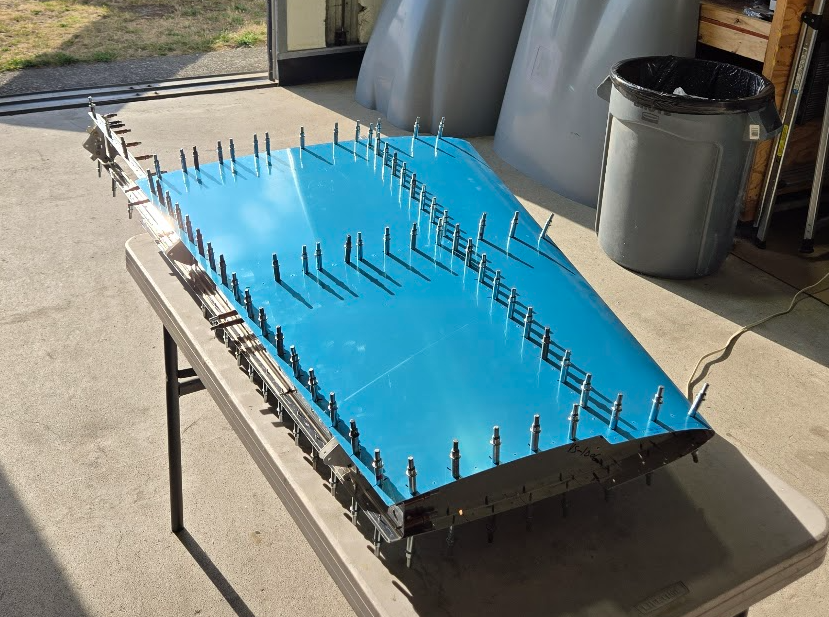
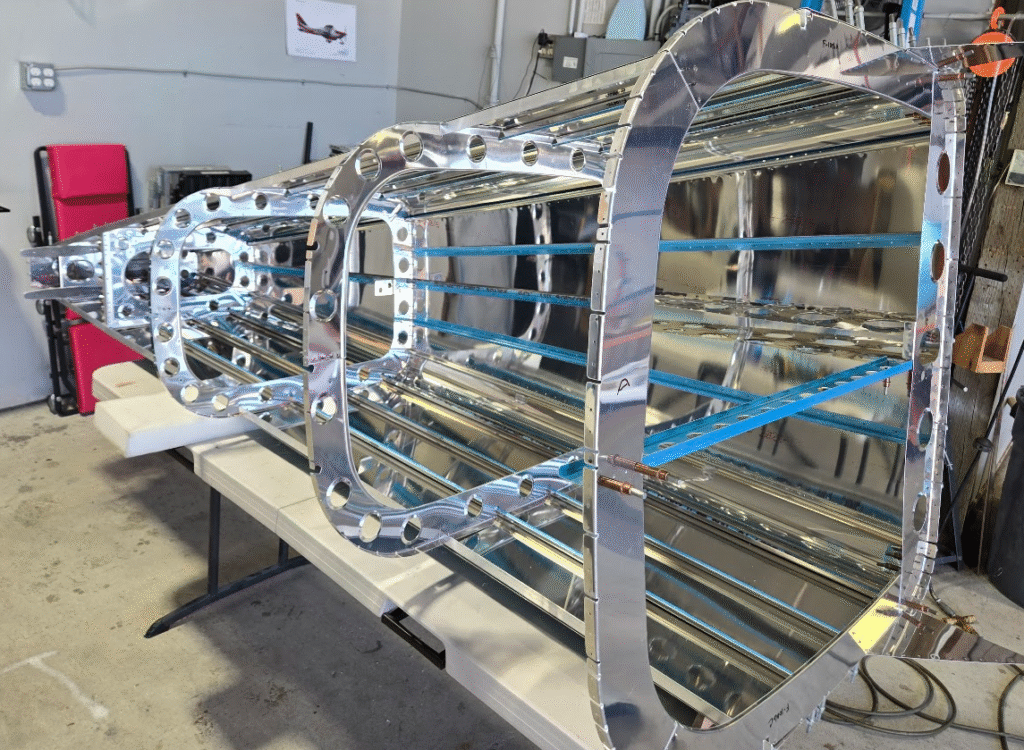
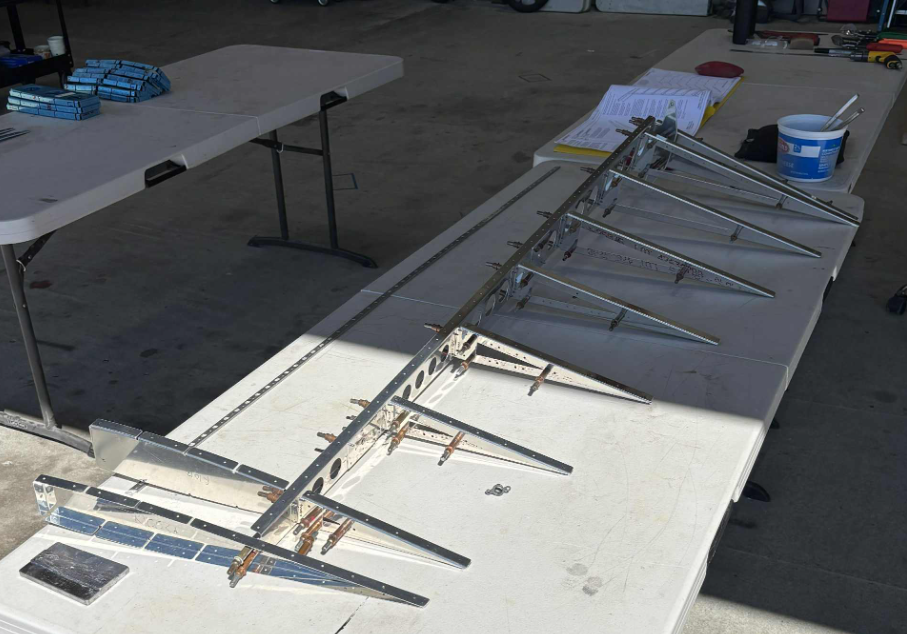
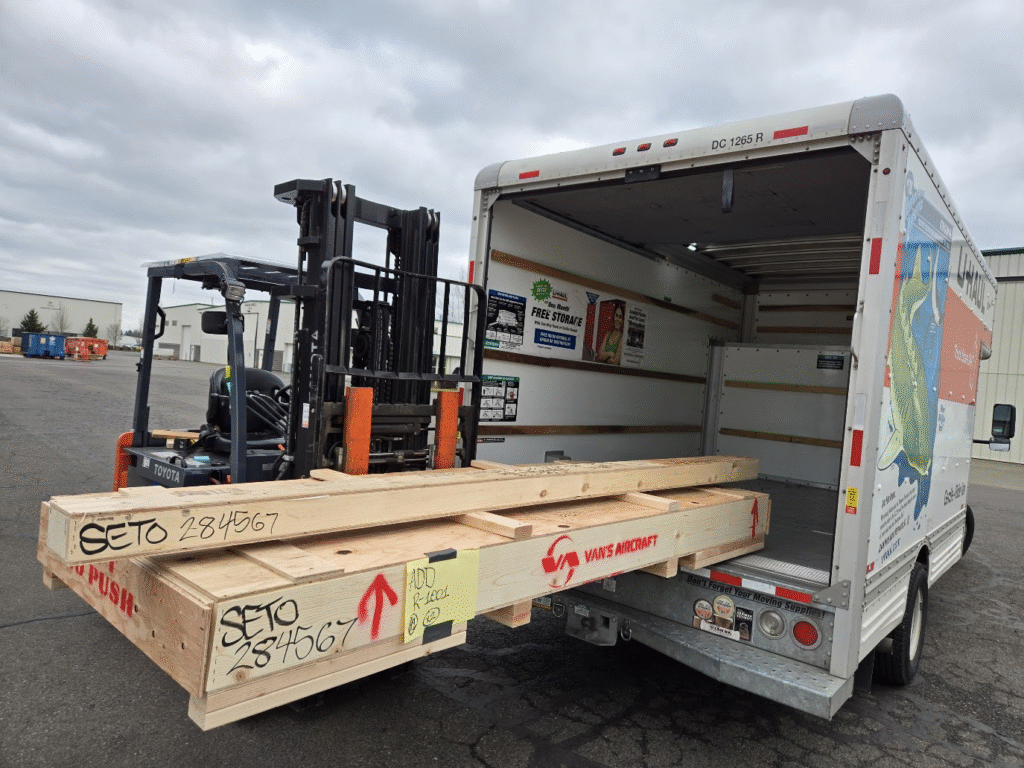
Fuselage
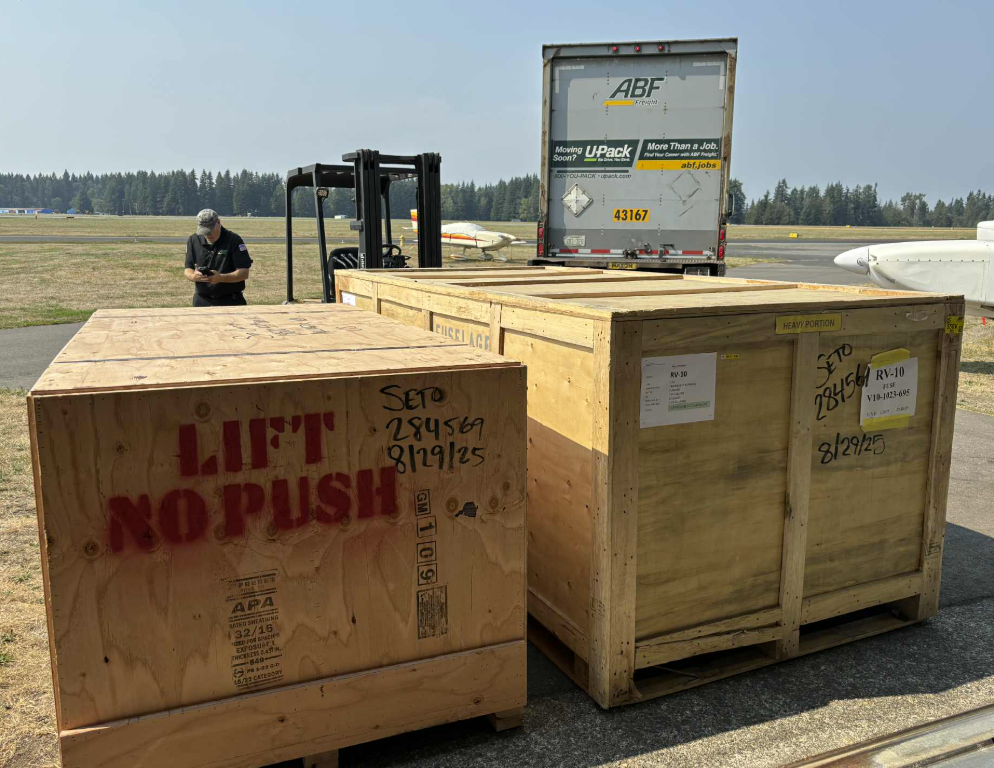
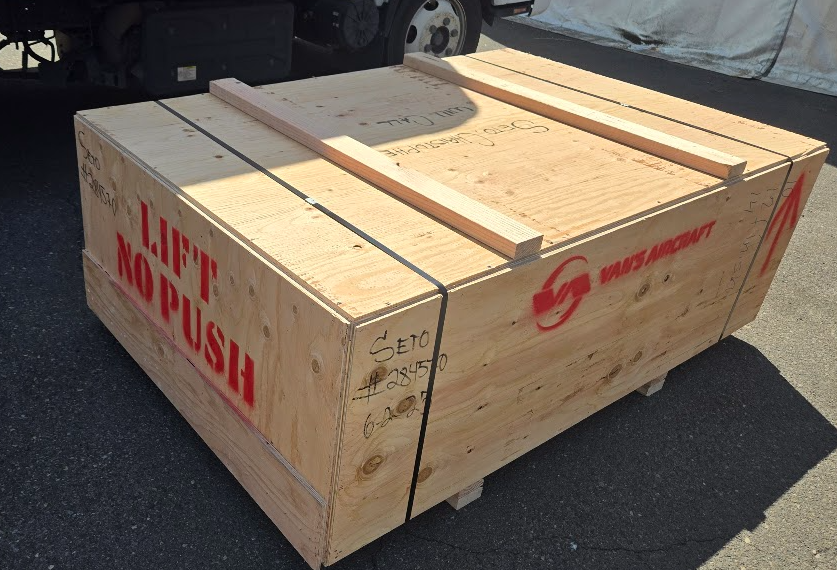
Yesterday was another milestone day. The fuselage arrived! I was busy at work so Ephraim handled receiving the crates.
Fresh from Aurora
Some notes on how this works:
The delivery time to KAWO was about 4 days total
A few days before it shipped, I got emails from Vans and ABF
The Vans email contained an estimate and instructions to check damage and report it while the driver was still present
The ABF email was an invoice. The amount from Aurora to KAWO was $1851.13 and matched the Vans estimate
I called ABF with contact details and instructions on how to get into the airport to Ephraim’s hangar
ABF called the day before the shipment arrived to confirm we were expecting them
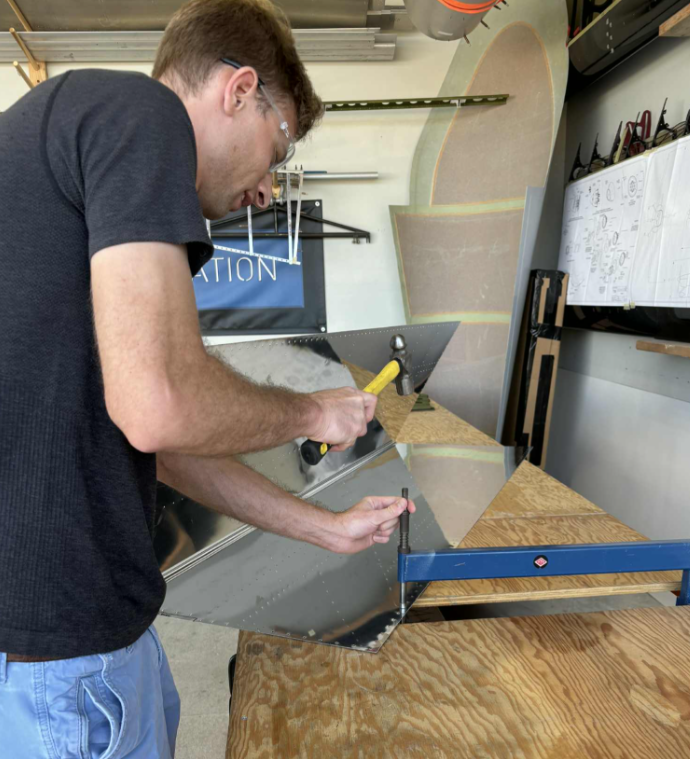
Ephraim shooting me mid dimple. Note the composite tailcone in the background
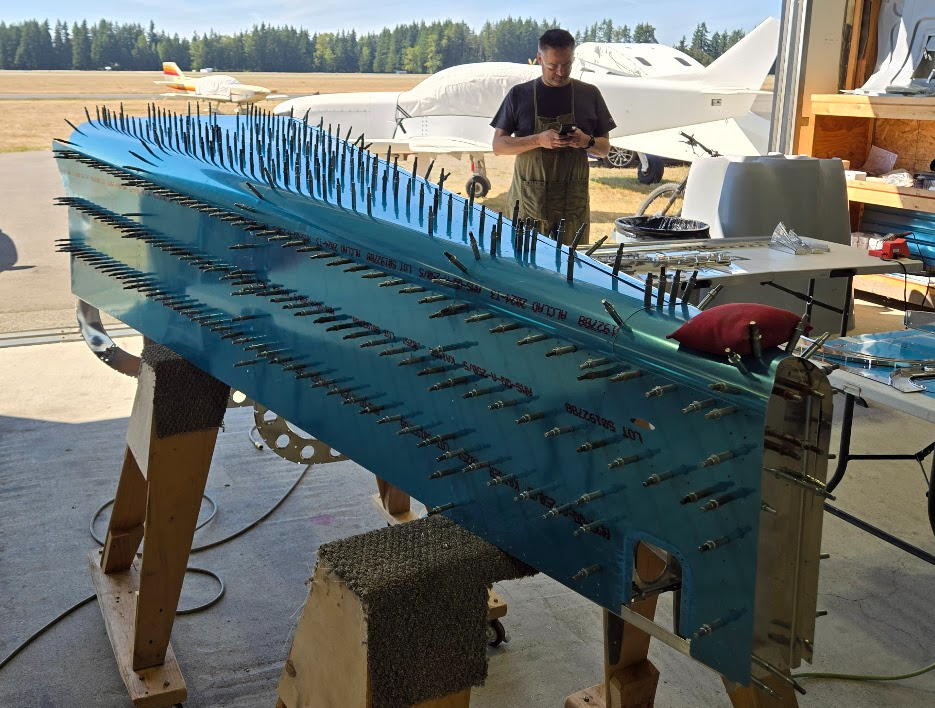
Hstab
I dimpled, Ephraim primed. Both Hstab skins are completed and ready for final assembly
Vstab
Vstab skin is also dimpled and ready for assembly.
Pictures and videos
I’ve not taken as many pictures and videos as I probably should have. Ephraim has though. I need to fix an issue with the max upload size in wordpress, and then I’ll make a big scrapbook post of all the media Ephraim’s captured.
SB 18-03-30
Ephraim had remembered from an RV10 condition inspection that SB compliance with SB 18-03-30 resulted in a different elevator endstop than our plans said to fabricate. He raised this to me, and it also took a little bit of digging to work out what was going on with this. I posted the following on the RV10 facebook group, which is probably a good description of our confusion:
I have RV10 #43115 (ordered Nov of 2024), and we came up with a question on the elevator upstop referenced in SB 18-03-30 today. Wondering if anyone has the answer?
SB 18-03-30 addresses an elevator jamming condition and compliance with the SB involves fabricating a new elevator upstop, to replace F-1012D.
My assembly manual does not show fabricating an F-1012D in the shape of the upstop from the SB. Is this an issue of Vans not updating the assembly manual, or is it possible the elevator jamming condition fixed by Vans changing the trimming of the control horn (which would be my other guess as to why my manual doesn’t show the SB’s F-1012D, though is pure speculation and not mentioned in text anywhere)?
I called Vans and builder support advised the following:
The SB supersedes the assembly manual
The build tech support rep wasn’t sure why the SB material wasn’t included in the modern RV10 kit
The build tech support rep suggested fabricating the elevator upstop according to the SB
This means buying new angle material, the material to make the upstop according to the SB is not supplied in the kit
Additionally, it was advised that it may be necessary to file the upstop so that the elevator hit both sides at the same time when moved to maximum up throw
Project Management
I’ve been continuing to work with vendors to purchase parts. Given how quickly the build is going, I feel like I have a fire under me to continue to buy parts, for fear of being blocked soon due to lack of material. I’m still getting over how difficult it was to buy things during COVID. I don’t feel bad buying parts months ahead of time, just for fear of long lead times.
I need to update the materials list in this blog, but I have purchased the entire fuel system, many interior parts (all from Aerosport), and many extras. Maybe next post I will detail this.
This week, I’ve started to see the more monotonous side of building airplanes. Every day of this build has been a new “episode” and slightly different, though now with enough parts together to begin cleco’ing together major components, we’re getting into the steps which involve a lot of the same operation over and over again.
Hstab
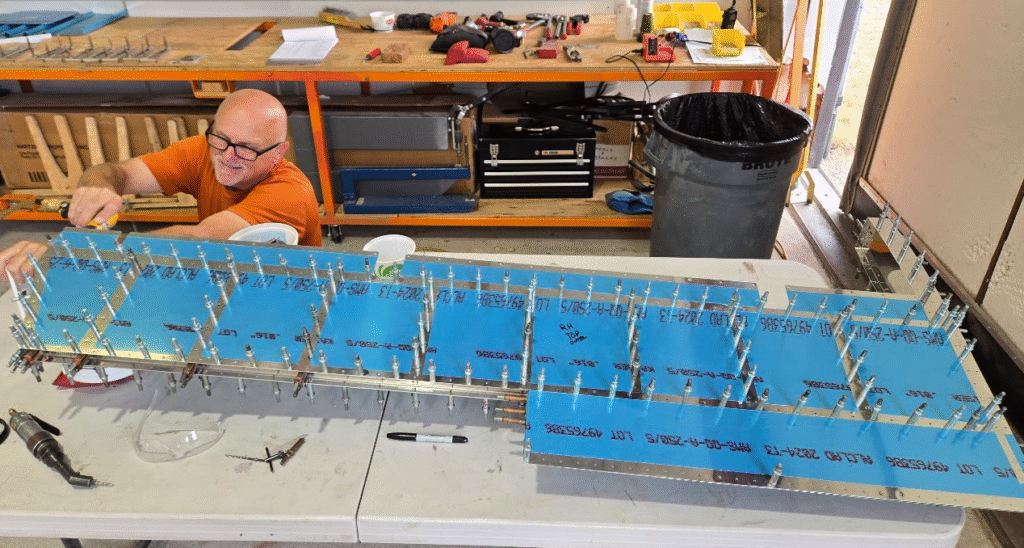
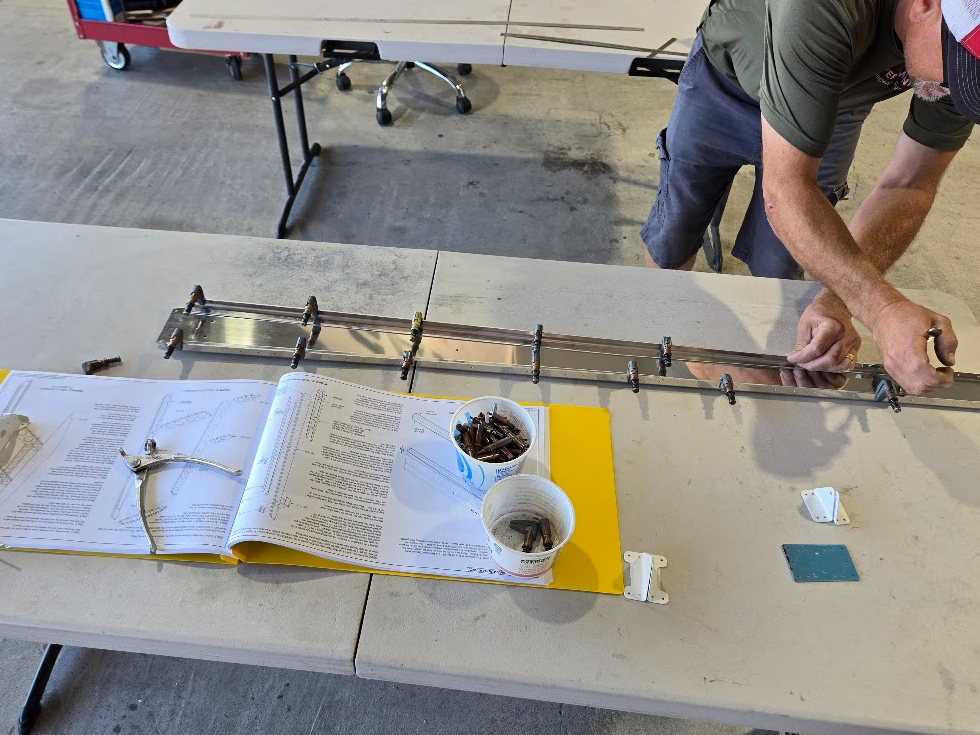
Ephraim Cleco’s together the Hstab and set me to work pass drilling the skin/rib flange stackup. This took forever to pass drill all of the holes without clecos, and the clecos were moved over to repeat the same slog all over again.
I’ve worked on production style manual tasks before, and I know the importance of working in patterns. Without a good pattern, you could easily end up accidentally repeating work or leaving holes undrilled here especially, since the final size is so close to the predrilled size.
(As Ephraim instructed me to do) I marked each uncleco’d hole with line in sharpie, and then began drilling. First, around the perimeter, then again with the clecos swapped. Then lines of holes across (swap cleco, repeat), then lines of holes going down (swap clecos repeat). I think Ephraim may have actually had a slightly different pattern that he recommended, but anyway this one ended up working.
I think any good production pattern should have some feature which identifies completeness. For this pattern, for all lines of holes, all holes marked with sharpie should be loaded with a cleco if the line is complete.
Elevator
The elevator ribs are composed of two sheet metal parts which come joined together as one. Ephraim had already marked these for cutting, so the work remaining for me was to perform the cut and debur. This was another task which took a lot of time. Ephraim has emphasized the importance of deburring, so I try to be as thorough as possible.
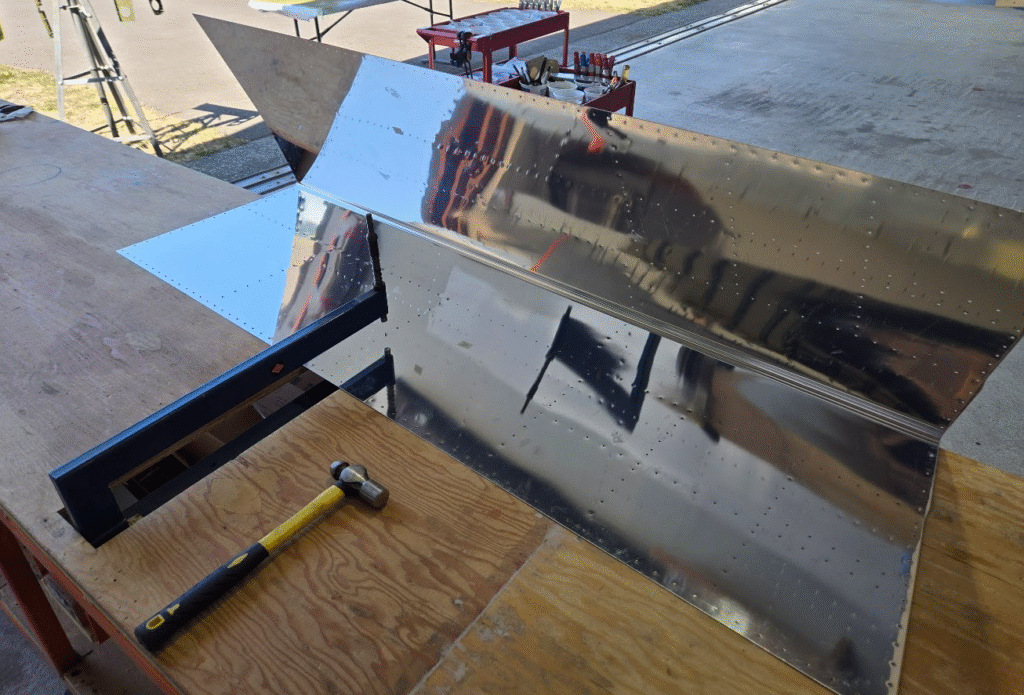
Tail Cone
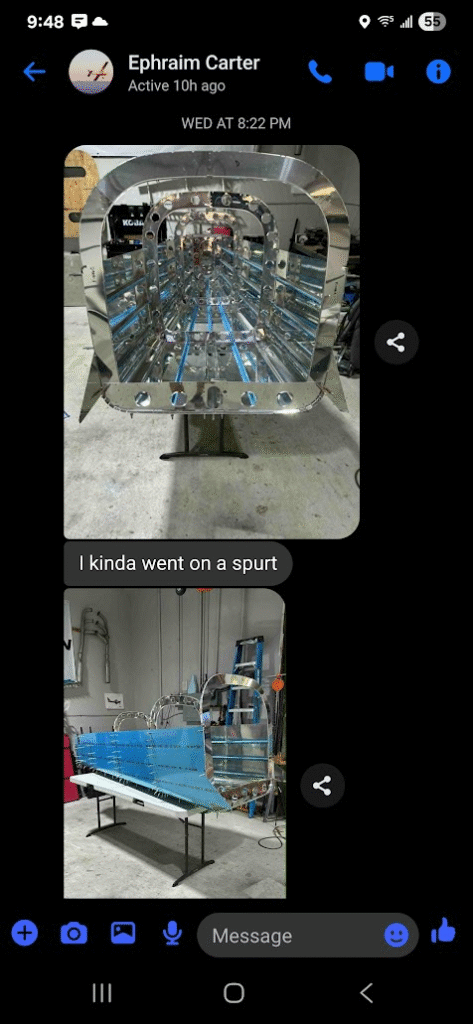
Imagine my surprise when I left for the day without a tailcone on the bench, and recieved this text from Ephraim that evening:
“Well I had all these parts laying out and I just wanted to see what they all looked like assembled”
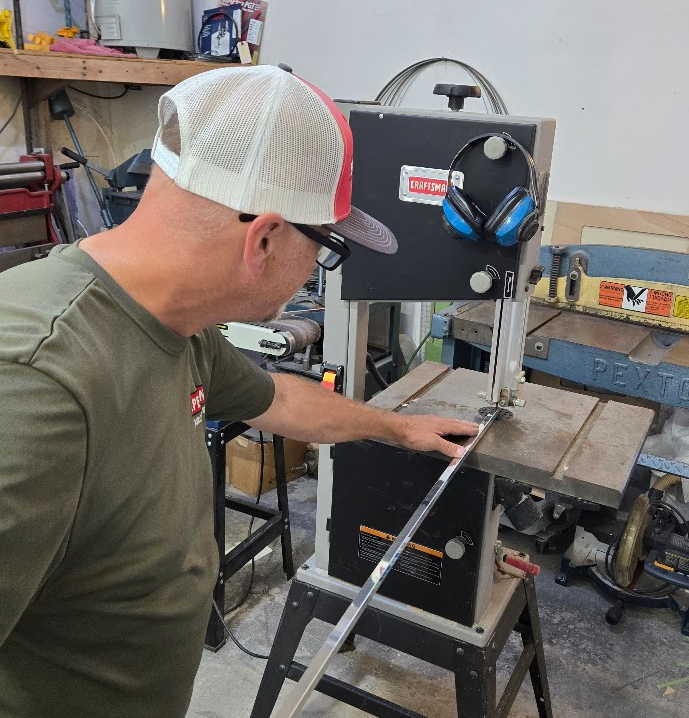
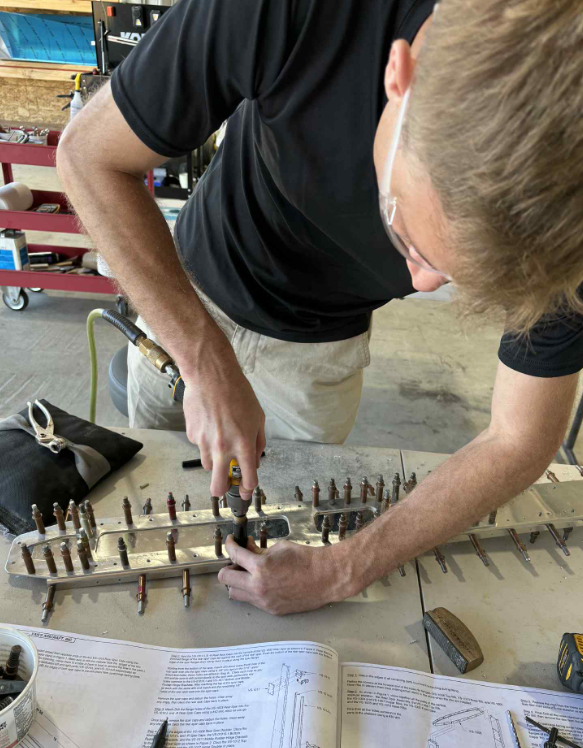
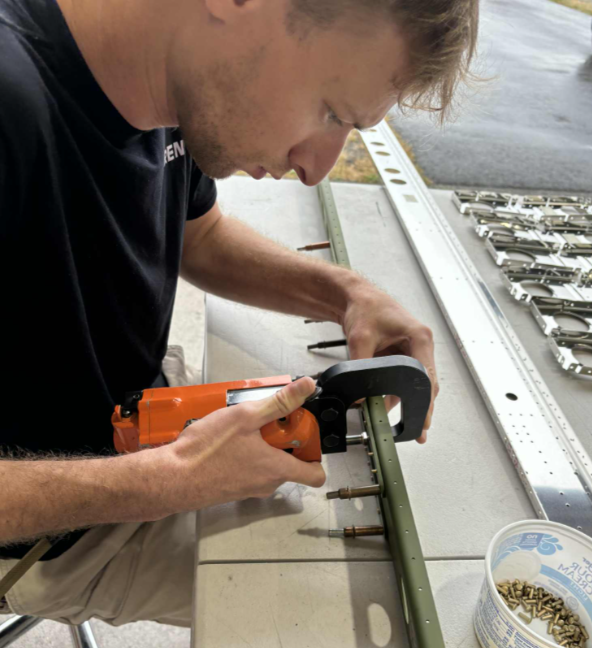
The next day, Ephraim and I worked together to begin match drilling the stringers. “I promise I won’t drill a hole in your fingers”, Ephraim said, while I applied pressure to the stringers to line up the center mark with the skin holes as he drilled from the skin side. We got a handful of holes shot, and then moved the tailcone to a set of castering carpeted sawhorses.
Shiny
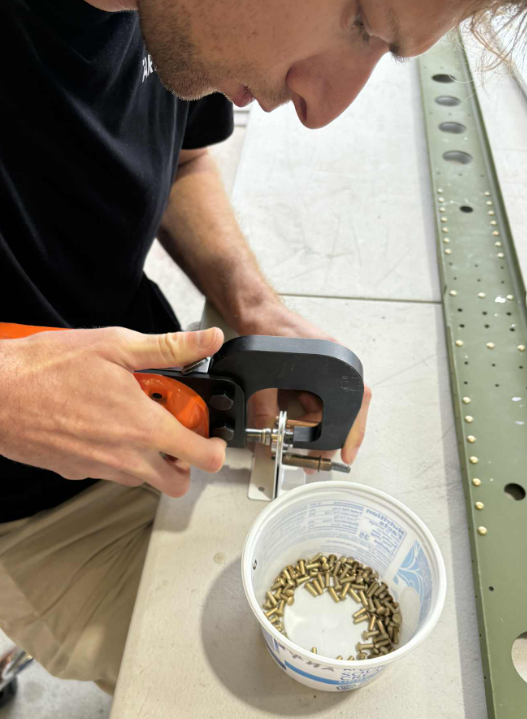
Ephraim instructed me on how to do the midspan match drilling by myself, using a rectangular piece of wood to pressure the stringer against the skin and then cut me loose solo. This was definitely one of the more nerve wracking parts of the build so far, but there is no gain without some pain. The first handful of holes took a long time. Shooting these solo, you’re awkwardly positioned and the stringer will want to move as the drilling starts,. It takes a lot to commit to starting to drill. Of course, I was also worried about drilling a hole in my fingers.
Another calibrated eyeball point: It was difficult for me to know how far off from center of the skin hole the stringer line could be before there was an issue. It turns out, it doesn’t need to be exactly perfect, although all of my holes were actually just about dead on. Ephraim assured me that even if it was off a little, it’d be OK.
After the first few holes were drilled, filling the remaining holes was pretty easy.
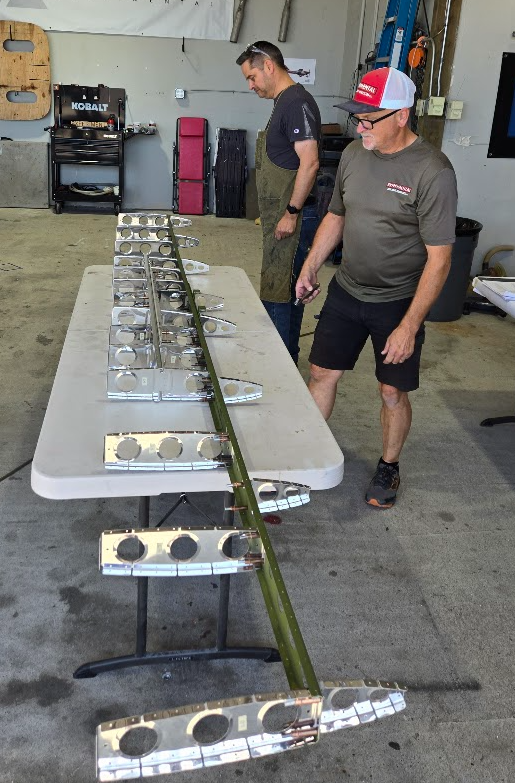
Around this time, Mark showed up. Mark is a regular helper at Ephraim’s build assist who just enjoys working on airplanes and generously volunteers his time. Mark was trained by the military in sheet metal work and now works at Boeing in a higher level role.
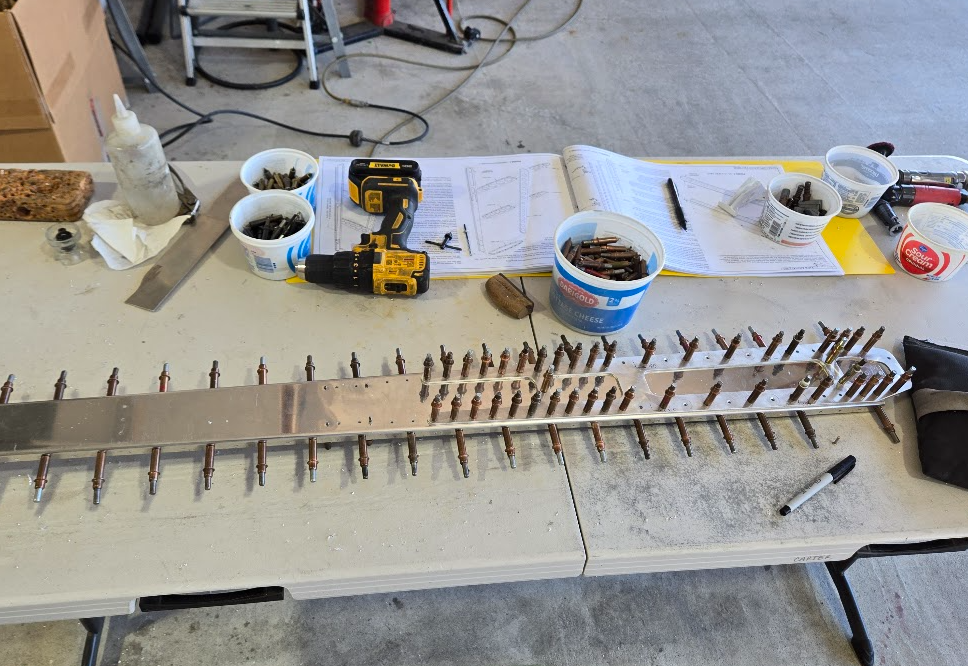
Mark and Ephraim started match drilling the stringers on the opposite side of the TC. Eventually, I finished my side and joined them on theirs.
Many drilling operations later
With 2 drills, we match drilled a LOT of holes very quickly. Times like this are when I appreciate that this could be tremendously time consuming if I was doing this on my own. Coming from the certified world, I’m not really used to a lot of community involved in airplane work. Community is the backbone of the experimental world. It is common to find people who just love being around airplanes and want to do things with airplanes, even if it’s totally selfless otherwise. I’ve tried to do my best to contribute. A few weeks ago, I helped Keith reassemble his RV12 post paint which was probably my first act of experimental community participation.
Back to the Hstab
With the tailcone stringer match drilling complete, the three of us all turned our attention to the Hstab. It was time to disassemble it and prep the parts for dimpling, priming, and then reassembly/riveting. We made quick work of reducing the previously cleco and cradled Hstab back into constituent parts.
Deconstructing the Hstab structure
Dimpling was another new construction process to me. I deburred the flange holes on a handful of ribs, and then Mark demonstrated dimpling them.
We flipped roles and I dimpled while Mark deburred. Again, another operation that’d be really painful solo. It sure was nice to eventually be able to say “ok… my hand is sore now, do you want to dimple some?”.
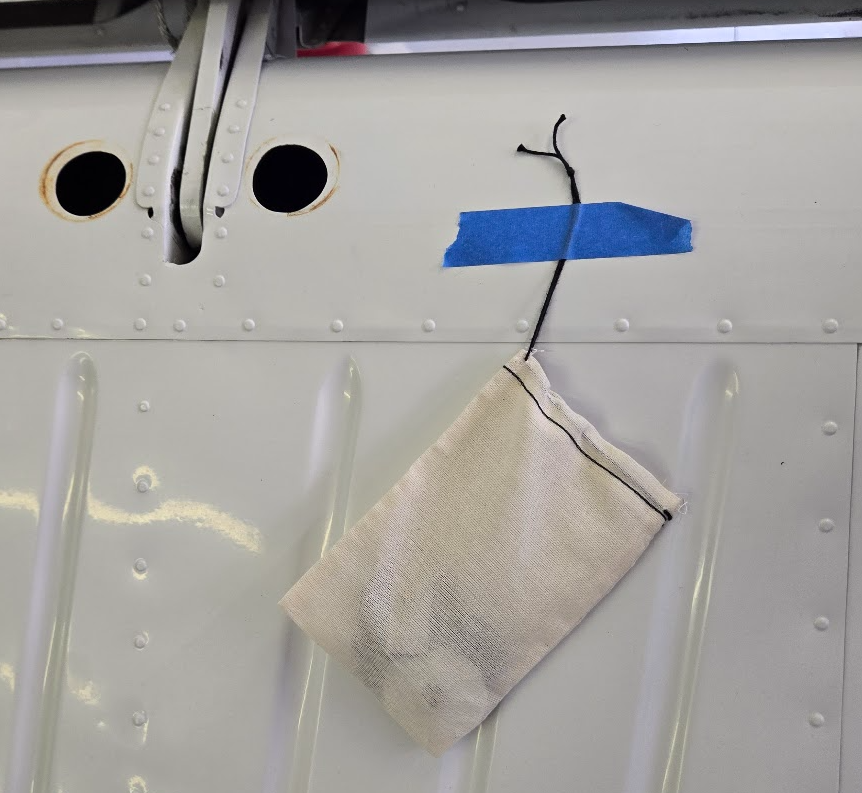
Bonus
Unrelated to 21X, I was out at KPLU getting 0SH’s oil change done. At the MX hangar, I noticed a disassembled Baron with tobacco bags hung from it containing the various hardware which has been removed. I’ve been flying for over 13 years and never seen this done before. The Baron’s ownerpilot was there doing owner assist MX, and I mentioned to him that I really liked this idea. He told me the secret was that the cheapest tobacco bags can be found on Etsy, go figure.
Ephraim was busy while I was away, and built the Hstab cradle
We still don’t have the backorder-stock-screwup rudder skin, or the replacement Vstab rear spar, so today’s forward progress forcused on the Hstab and eventually, the elevator.
But first, the RV14 skin mistakenly sent by Vans had to be boxed up to be sent back. This took a lot longer than I was expecting, and I think I owe Ephraim a new roll of tape after needing to “fabricate” a new cardboard box for it, but in the span of a big project like this, mistakes happen and it’s not blocking us (yet) so not a big deal.
While I was practicing sheet metal work on cardboard, Ephraim was setting up the next steps. As soon as I was done, he handed me Scotchbrite and a stack of Hstab parts with instructions on how to clean them (Scotchbrite + acetone) up in prep for priming. It didn’t take too long for me to have the parts clean, and Ephraim gave me a primer (lol) on shooting primer.
It’s not enough to be taught how to do these types of tasks. Having an experienced set of eyes to look at things and say “yeah that looks right” or “this needs more work” is incredibly valuable. I can’t say enough good stuff about a build assist service like what Ephraim offers. I think if I were to try to complete this project on my own, I’d be really slowed just trying to work out if I was completing the various tasks correctly. Judging if the priming layer is thick enough is one example of such a situation.
I spent the next few hour or two cleaning and priming parts.
With the freshly primed parts curing, Ephraim announced it was time to start the elevator, which meant a return to my now-cemented routine of removing blue wrap, marking PNs in sharpie, covering the PN with tape (to mask for prime), and deburring.
Not that any of the work on this project is unrewarding, but some tasks are more rewarding than others. Riveting the primed (and now dry) Hstab forward spar doubler assembly was a rewarding way to end the day.
Freshly primed Hstab forward spar stackup, during riveting
About the yaw damper: Yes, adding another servo is more weight, more complexity, and more cost, but I put real thought into this and I believe this to be a good trade. The stock RV10 plans do not include rudder trim. People solve this issue in a variety of ways: rudder wedges, spring based control cable bridal setups, or the Aerosport spin driven rudder pedal trim. I’m not a huge fan of any of those solutions.
The Aerosport spring system requires that their wind up box can be mounted in a compatible location. I haven’t planned my panel yet, and I’m not sure if I will have such a location. For any other spring based system, there is some offroading required since there is no other off the shelf solution. I am really trying to avoid this airplane becoming a science fair project, so developing a custom (probably tail cone mounted) spring trim mechanism seems to stray too far in that direction.
Wedges are simple and do work, but they only work at one airspeed. The airplane may sit slightly uncoordinated outside of that point in the envelope.
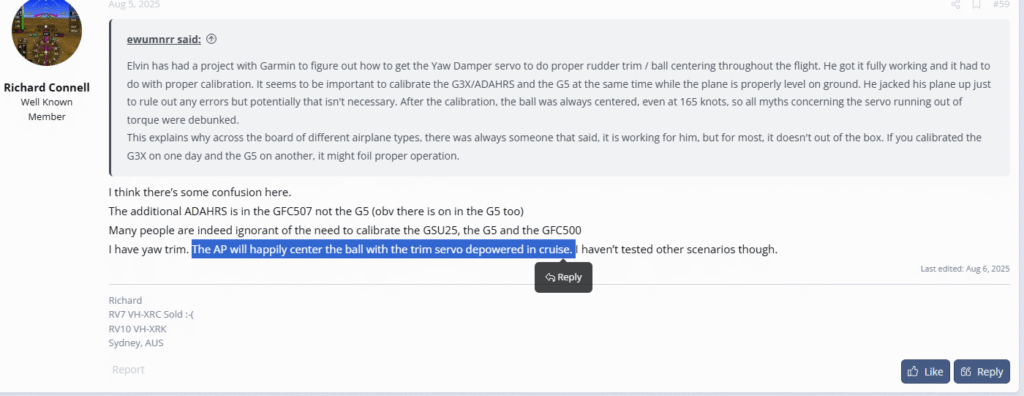
The function of the a yaw damper is primarily to counter yaw transients due to inherent yaw instability. I want to emphasize that I understand that yaw damping is not the same as yaw trim,. *That said*, it seems to be the case that if minimal control input is required, the Garmin yaw damper will also try to coordinate the airplane. See this topic on VAF, especially page 2.
The proof is in the pudding:
I told you guys
This is one of **several** pilot reports that the Garmin YD will try to center the ball.
I have been very careful in verbiage while writing the above. I have specifically mentioned the behavior of the Garmin YD because this isn’t necessarily something any other YD will do. Again, the main purpose of YD is to stabilize an airplane which is inherently slightly unstable in yaw. That said, many mechanisms referred to as “yaw damper” also include functionality to try to coordinate. I have seen similar pilot reports suggesting the Dynon YD will also try to center the ball.
Back to 21X. I like the idea of the actual YD functionality for backseat pax comfort, but what I’m really after is the coordinating tendency of the Garmin YD controller. It seems that all one needs to do is get the rudder trim “close enough” to perfect for the Garmin YD to take it the rest of the way. For that problem, a rudder wedge is almost certainly the right solution.
In summary, my rudder trims solution for 21X is a wedge + Garmin YD.
About the Bob Archer antenna: It seems like builder reports actually suggest this antenna works well enough in the RV10. I do fly plenty of single pilot IFR, however it tends to be pretty rare for me to use VOR based navigation or even ILS approaches. I think the probability of me needing to track a VOR enroute is essentially zero, which is probably the weak performing scenario for this antenna. I’m trying really hard to keep 21X clean, and having a typical nav antenna sticking out all the time for being used .001% of the time just bugs me. My plan is to establish the limitations of this antenna in flight test, and if they are found to be unacceptable and unfixable to shoot an ILS, I’ll revist this and probably install a normal nav antenna. On the other hand, if it works well, I’ll probably buy another for the other wingtip and wire it to the other nav radio.
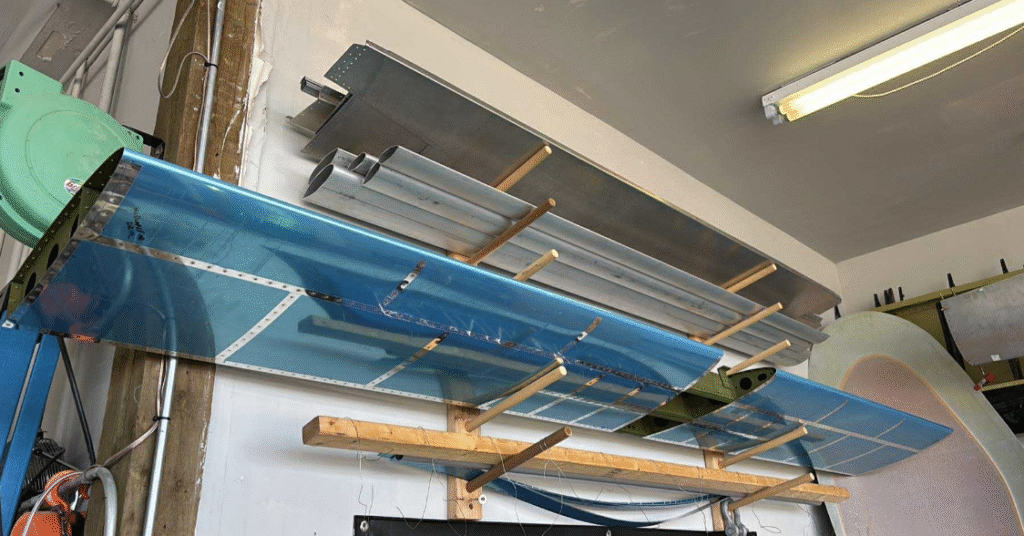
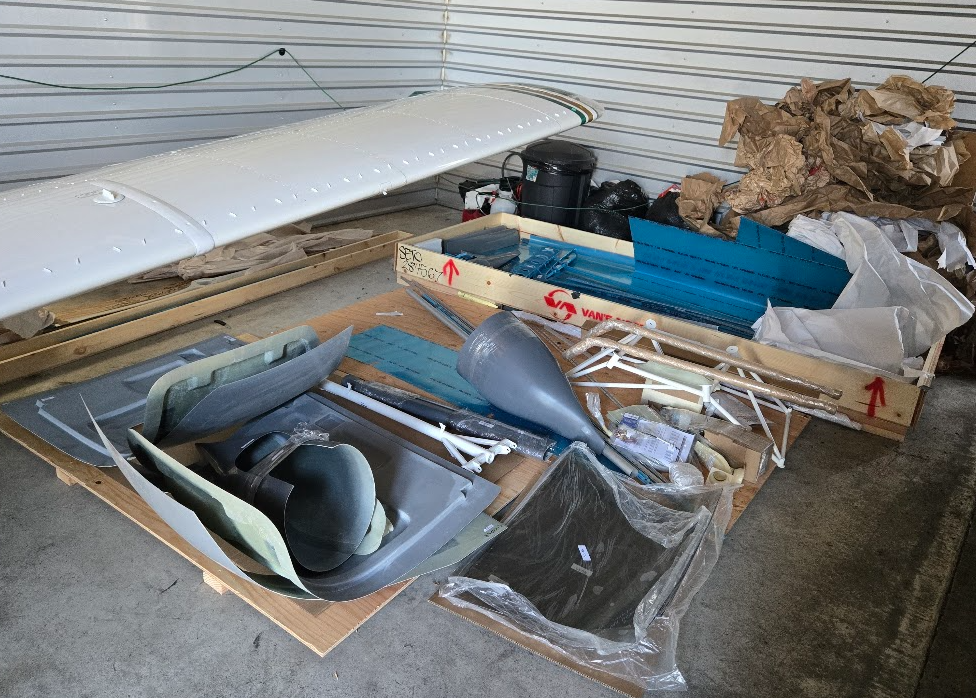
My slot at Experimental Aircraft Services opened on Monday 8/11/2025. I had been waiting for this day for over 8 months. A few days before, I had begun pulling parts from “stock” at my hangar at S50 to reposition to the house so that on the first build day, I could drive to AWO with the correct set of parts to get us through at least the first few pages of the build manual.
Emp + Finish kit in my hangar, prior to build start
I arrived at EAS while Ephraim was finishing up with the build assist prior to mine. I unloaded the car and sorted the parts PN facing up, with all of the Vstab group off to one side. Pretty much no sooner had I done that than Ephraim came over to start the build.
Ephraim starting to prep the end caps
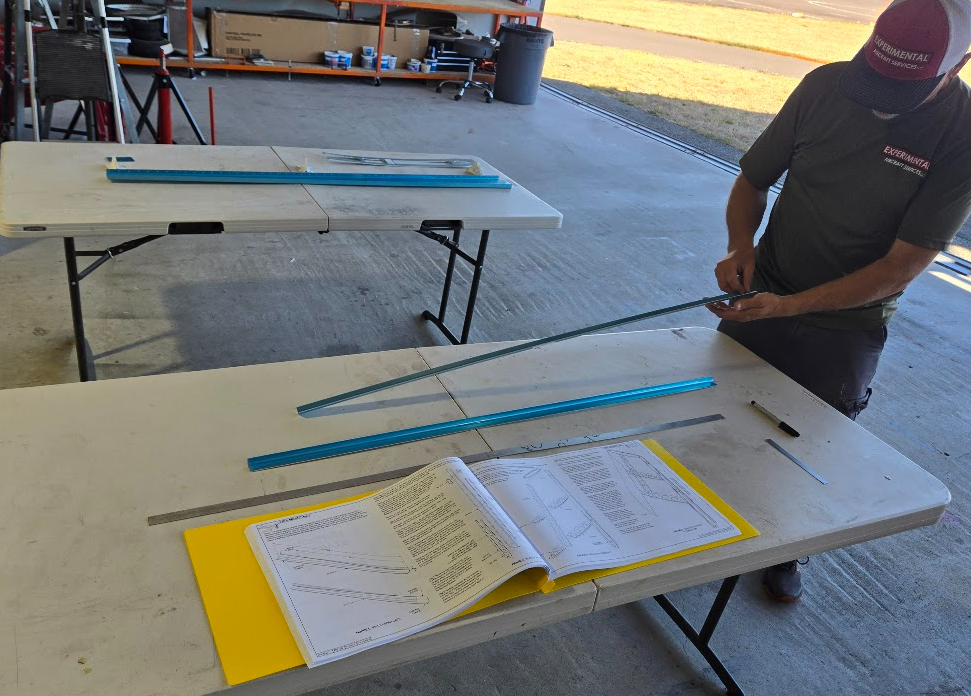
The RV10 build famously starts with cutting a triangle wedge out of the two Vstab rear spar endcaps. Ephraim demonstrated how to cleco the two mirror image parts together to bend them straight and mark them. We then unclamped them, then Ephraim demonstrated cutting one endcap. With that done, we swapped, and I cut mine while Ephraim took a video of my first cut.
Ephraim making the first cut
The rest of the day, we followed the assembly instructions in order. We ended the day with a rear spar with doubler and endcaps cleco’d in place.
Ephraim prepping the end caps for match drillingCountersinking the spar doubler
End of day one
Tuesday
I arrived with more parts to unload. Ephraim broke the news that he noticed we had made a small error during the previous day. We had mistakenly drilled a set of holes with a #30 bit instead of the prescribed #40. Oops. Not a big deal though. These sheet metal parts are cheap and Vans keeps them in stock (I wondered if they keep an especially large stock of the Vstab parts, since they would be the very first parts used in the kit and presumably, most likely to be messed up). Given that these parts were my first experience with sheet metal work, they were slightly rough, and I didn’t really mind the idea of not using them, even though the mistakes were only cosmetic.
While I worked on ordering a new rear spar and endcap, Ephraim noticed we were missing the rudder striker plates and the associated part. Hmmm, I am VERY sure I did not lose them from the bag during inventory. That said, I decided early on that there wasn’t enough point to inventorying anything that wasn’t easy to inventory (ie things lacking visible PNs). After all, the possibility of missing parts should be tiny, and any parts so small that they can’t be printed with a PN should be cheap. I figured my time was probably more valuable than to check every non-visible-PN’d part. I’m guessing Vans really did miss these parts though. We’ll call the $20 total replacement cost a “donation”.
With replacement parts ordered, we paused the Vstab section and moved onto the rudder.
In the months waiting for the build to start, I had dreaded physically modifying the kit parts, especially cutting them up. The rudder would be the first part of the kit to really break me of this fear. The rudder consists of ribs which are each constructed of two sheet metal parts cut from aluminum angle. Ephraim marked the parts, and I cut them out with snips, sanded the snipped edge to the measurement line, and then deburred them.
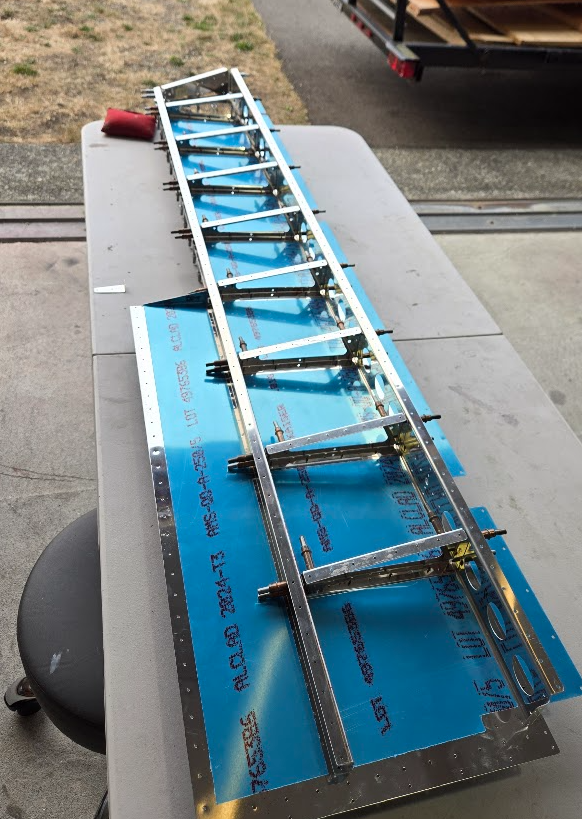
I left for the day having completed cutting/sanding/deburring my share of the rudder parts. About an hour later. Ephraim texted me a photo of the entire rudder skeleton Cleco’d together. Nice!
Rudder structure
Wednesday
By the time Wednesday rolled around, I was sufficiently behind on job work (as opposed to 21X work?) that I needed to do that instead of building. I did still manage to get some tasks completed for 21X though, mostly in the form of ordering things.
I had been staging kit parts at my hangar at S50, and had managed to bring over a good chunk of them in my Subaru BRZ. Though we had reached a roadblock in that we would soon need the Hstab spars, and that wasn’t going to fit in my car. Ephraim VERY graciously offered to drive from AWO to S50 and back with his VW bus to pick up the remainder of a kit. This was seriously above and beyond and highly appreciated, because otherwise, I’m not actually sure how I would have done this without renting a Uhaul or something. So, Wednesday morning Ephraim showed up and we loaded up the remainder of the kit, minus landing gear and engine mount (the former is easy for me to transport after the VW bus was full, and the latter needs to go to Barrett for rework to fit their CAI sump).
A few hours later, Ephraim called me with more potentially bad news. He couldn’t find a rudder skin that was marked backordered on my inventory sheet. Uhhh… I thought that was delivered months ago?? Nope, Vans screwed up and we soon realized they actually sent us an RV14 Hstab skin instead of an RV10 Rudder skin. I started the support case with them to get this resolved.
Thursday
Thursday was another at home day. I spent a lot of time buying stuff.
The first thing to buy would be the firewall forward kit components. I had been putting this off, mostly because Vans doesn’t actually have a spreadsheet detailing what’s in the kit, and with my CAI setup, a lot would be deleted from the kit. Sure they have the raw listing on their website, but that is horrible to try to parse through. For the sake of future builders, I made a spreadsheet of firewall forward components here.
I also worked out the fuel system arrangement and BOM. Because my installation features a mechanical fuel servo (not one of the fancy electronic fuel injection systems), my fuel system is pretty straight forward. Tom at https://www.aircraftspecialty.com/ was a major help and suggested I buy his RV10 cabin fuel system option #3, PMag kit, and FT60 relocation kit. Ephraim has the tooling to crimp hoses, so we’ll just make our own oil cooler hoses.
While I had initially wanted to use the Newton fuel selector due to its low price, better availability, and for aesthetic reasons, the vibe I got from Tom was that this may not be drop in with his fuel hose system. I did notice that the Andair FS20X7T was actually in stock on Aircraft Spruce, so I ended up just buying that. I had previously heard that the Andrair valve had a lead time of up to 9 months, but I guess that wasn’t a factor at this time; it was just in stock.
EI FT 60 FUEL FLOW TRANSDUCER FOR < 350HP / FUEL PUMP
LORD ENG MOUNT # J-3804-28
COMANT TRANSPONDER BLADE ANTENNA CI-E05
While I was spending money, Ephraim was continuing to work on the kit.
Friday
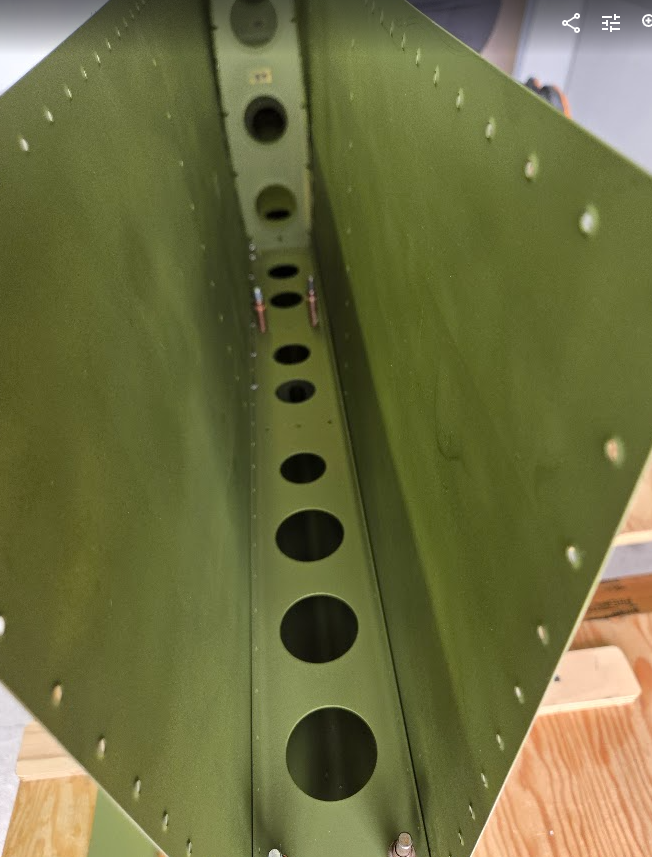
I arrived in the morning to see the Hstab rear spar primed and hanging to dry already! With the green primer on, it looked like a real airplane part.
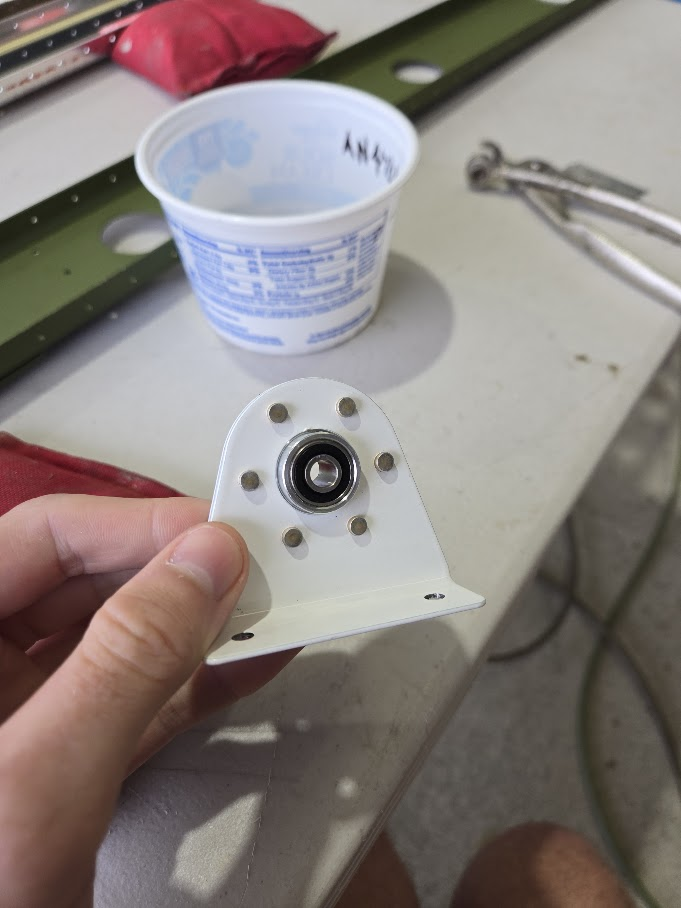
Ephraim mentioned we were actually ready to rivet too, attaching the rear spar doubler to the rear spar and assembling the elevator bearing.
Oh yesRiveting the spar doubler to the sparOne of my first few rivets on the airplaneI drove all these!Assembled, torqued, torque sealed
On our first build day, Ephraim spent a lot of time coaching me on the basics of sheet metal work: Cutting, sanding, and deburring. The same techniques would apply to the Hstab parts, so with the riveting/Hstab assembly done, I got to work independently on that.
I learn best when I am shown how to do something to a competent level, and then allowed to go off and do it by myself. Ephraim and I work well together, but also our process has just naturally converged on something that works really well for me. Spending some time alone working on the parts gave me time to finesse my new skills.
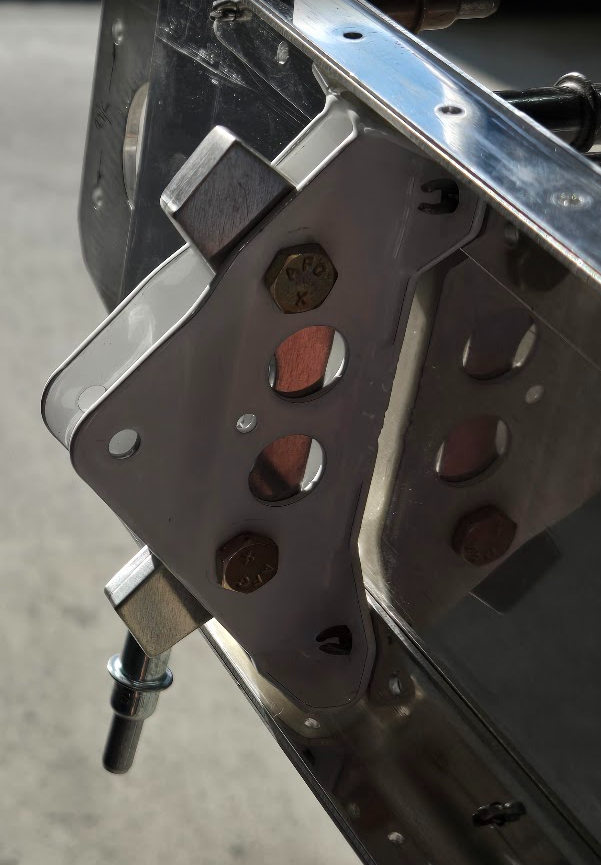
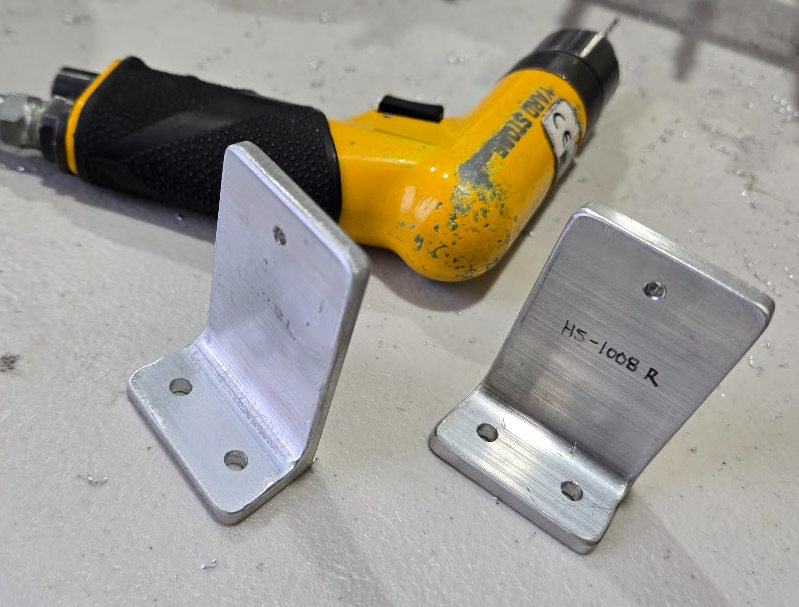
Ephraim was off doing some other kit components, but it wasn’t until I finished up with my Hstab parts did I realize he had just fabricated the Hstab attach brackets! He finished one and then only partially the other. I’ve learned that when Ephraim makes something look like it was effortless to produce, I should be fearful for the effort that awaits me to duplicate what he just did. Finishing the other bracket was a bit more of a challenge, and I will admit I had to pull a lifeline for Ephraim’s help. In the end, we were left with two nice looking matching mirror image brackets.
Niiice
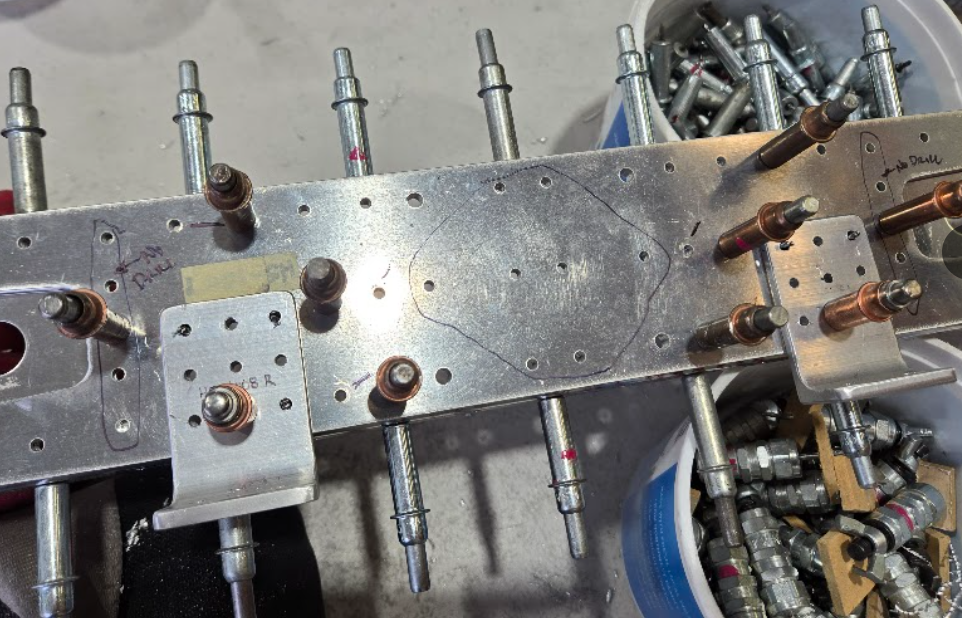
The brackets were not left alone on the bench for long. Next, we match drilled them to the Hstab rear spar.
Match drilled Hstab mounting brackets
Some more misc work followed (countersinking, part labeling/blue tape removal/etc), and we called it a day.
This post covers the timeline between purchasing the kit in November of 2024 and start of the build.
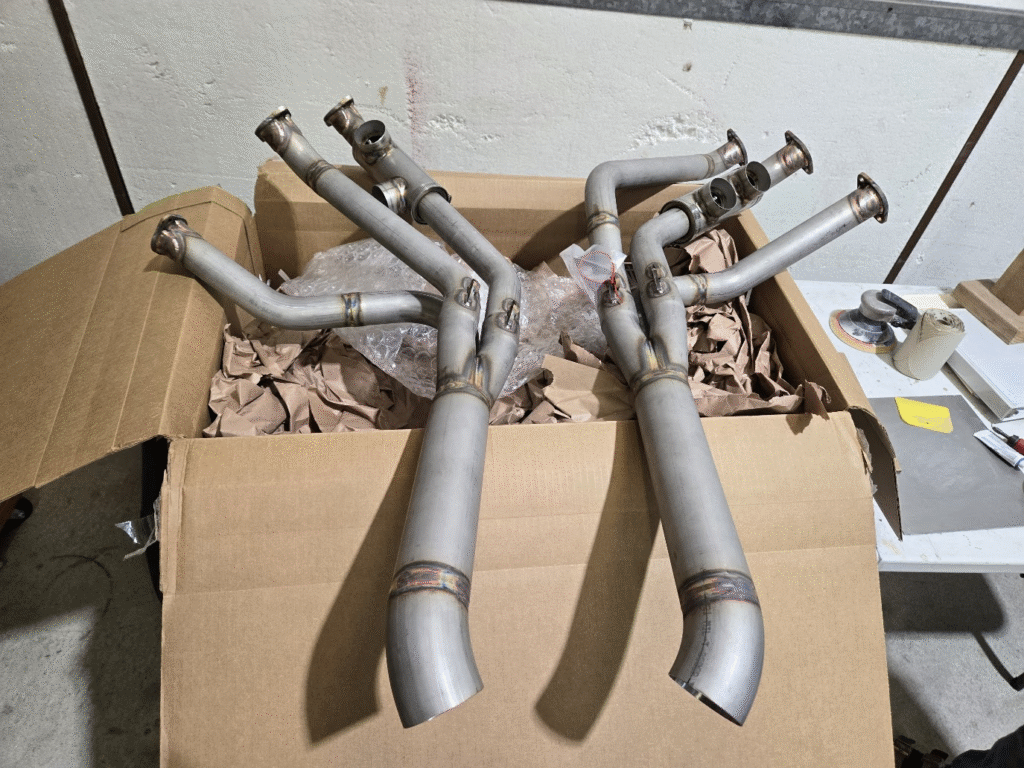
First Landed Part!
The exhaust (from Custom Aircraft Parts) was the very first item to arrive.
My New Friend Keith
I made an introduction on the RV10 Facebook group and had started to socialize that I had started the project. I’m not sure which Facebook group he found me on, but my now-friend Keith reached out with an offer to meet up and check out his RV10. Even better, he needed a flight review. OK!!
I met up with Keith at his KOLM hangar. This would be my first time really getting to see an RV10 up close. Keith and I got to know eachother, and knocked out a flight review oral before launching to KTTD for the practical portion. The trip to TTD was multi purpose. We needed some flying to do the practical portion, of course, but we also were going to pick up a part. We meandered our way south doing the FR tasks on my hitlist. Keith showed himself to be a great pilot.
On our way out of TTD, I was in for a surprise. Keith offered to switch seats with me, so I could fly the return trip. WOW, YES PLEASE! Turns out Keith was not only a great pilot, but also had great instruction skills as he talked me through the transition notes for his airplane. Keith’s RV10 really flew nice. The takeoff performance was what I found to be most astounding. I really don’t like to speak ill of my PA28-180, but it is, quite frankly, a porky pig and I dread climbs and short field ops. The RV10 felt like a Mooney++.
Arriving back into OLM, Keith walked me through a landing. Easy! I’m always a little nervous about landing other people’s airplanes, especially exotic/high performance types, but there was no fear warranted for the RV10. A perfectly reasonable touchdown was had by easing off the power, and letting the airplane settle onto the runway while maintaining directional control.
Empennage
It didn’t take long after purchasing the kit for the empennage to be ready. I asked Vans for a ballpark shipping quote and they said $1000. Meh, I could probably do it a little cheaper, and I wanted to see the Vans factory and get a ride in the RV10 demonstrator. I asked Vans for “Will Call” and booked a UHaul.
I am used to driving my Subaru BRZ sports car. I am not used to driving a box truck with no rear visibility. The trip was a little nerve racking, but I did manage to get to Aurora and back, with both crates of parts unharmed and with really minimal trouble. I also got a factory tour and a ride in N410RV.
Pulling up to my hangar at S50, I was hoping I’d be able to extend the loading ramp and then push the crate down onto my hangar floor. That was absolutely not going to happen. I really underestimated how hard it is to move a several hundred lb crate. Luckily, I found some airplane mechanics working in a hangar next door to help me, and between the 3 of us we were able to unload the large crate.
Over the next few days, I completed the inventory with no issues.
Showplanes Composites
In March, the Showplanes cowl + composite tailcone arrived.
Fast forward to June, the finish kit came ready. I repeated the routine from the empennage kit, though, this time with a UHaul pickup and without the tourist activities at Vans. Arriving back at my hangar, I opened the crate still on the truck and unloaded it part by part. When I was done, I just pushed the empty crate right off the tailgate. Done!
Inventory of the finish kit went much more quickly than the empennage kit. The finish kit has less very small parts, and less very large parts, which means nearly everything is marked with a PN and easily accessible.
RV10 Mods
I ordered a handful of RV10 mods, mostly inspired by community vibes and the fear of long lead times.
Planearound 3rd latch kit
Airward tunnel access kit
Airward reenforced hinge kit
Oshkosh
I’ve known my friend Bill about as long as I’ve lived in Seattle (5 years and counting). As long as I’ve known Bill, we’ve talked about going to Oshkosh together but hadn’t actually ever really committed. With the RV10 build looming, and Bill wanting to also start a new project (something like a Bearhawk?), we had enough motivation to really, actually, finally go to Oshkosh this year.
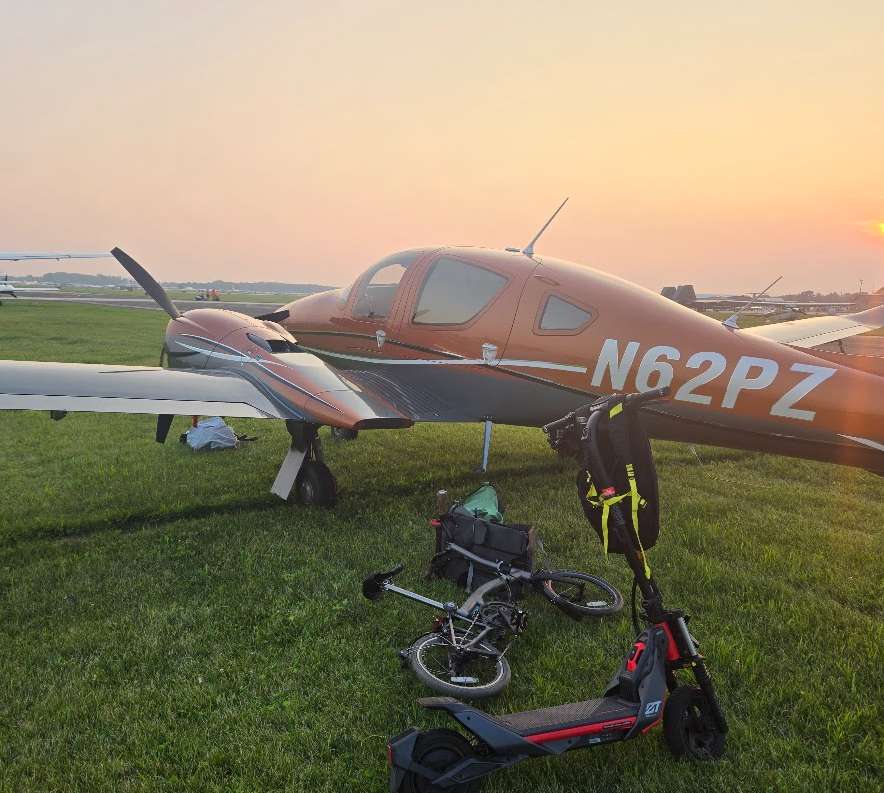
Bill and I had originally planned to make the trip in his Carbon Cub, but over lunch we realized the trip in the Cub would probably be too long of a slog for either of us to remain enthusiastic, so we opted to switch up to taking Bill’s DA62. With long range, a quiet/comfortable cabin, oxygen, WX radar, TKS FIKI, and the performance to easily climb up high, the DA62 is about the best possible GA XC airplane until you get into the turboprop category.
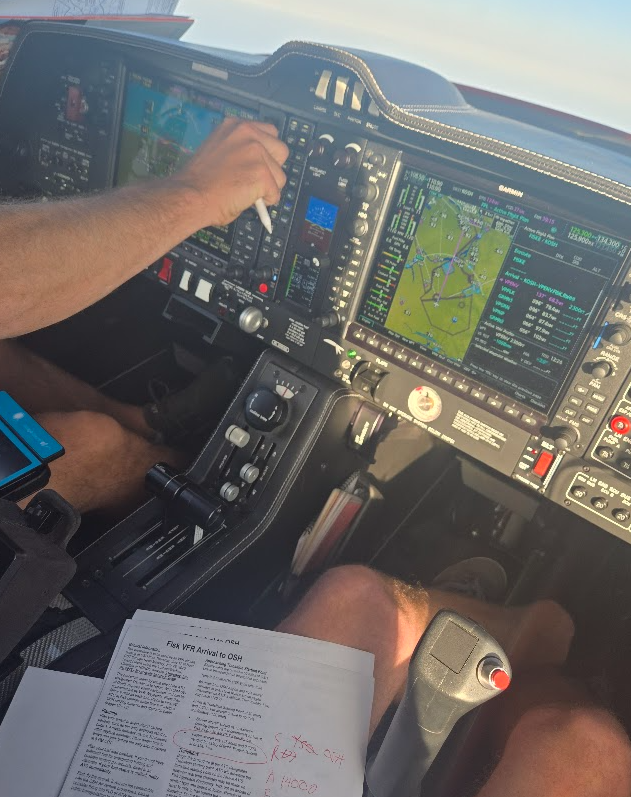
Bill and I made the trip from BFI to OSH in about 8 hours, arriving just before the arrival window closed at 8:45. This was my first time flying the arrival in a long time, but with WX holding back traffic arriving from the south, we had the high/fast approach all to ourselves making for an especially easy arrivial.
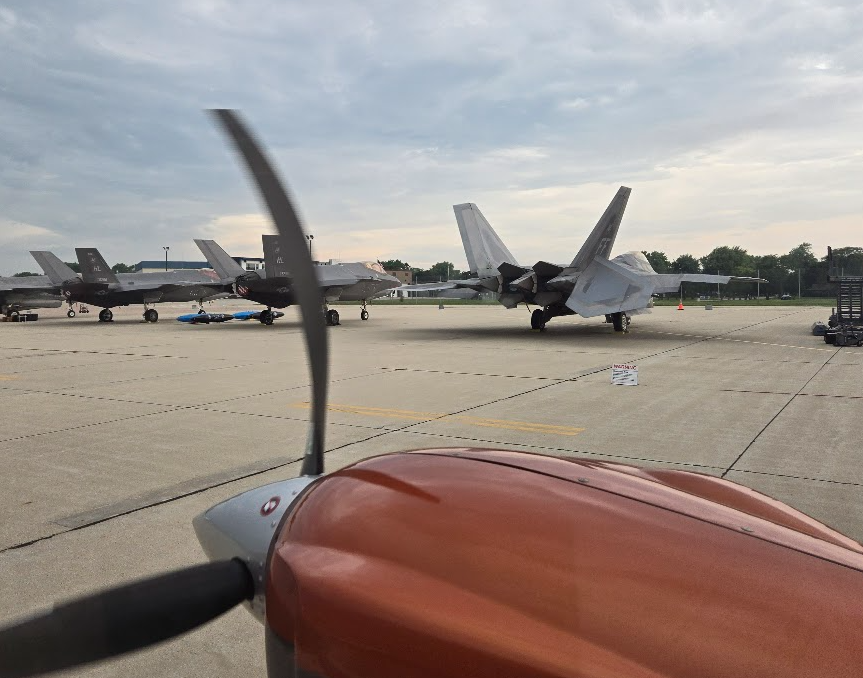
At Oshkosh, I hit up the vendor booths and got to know the community by walking around the RV10 rows in the morning as folks were getting up and socializing. I met a lot of great people who were all very eager to get to know me and show me their airplanes.
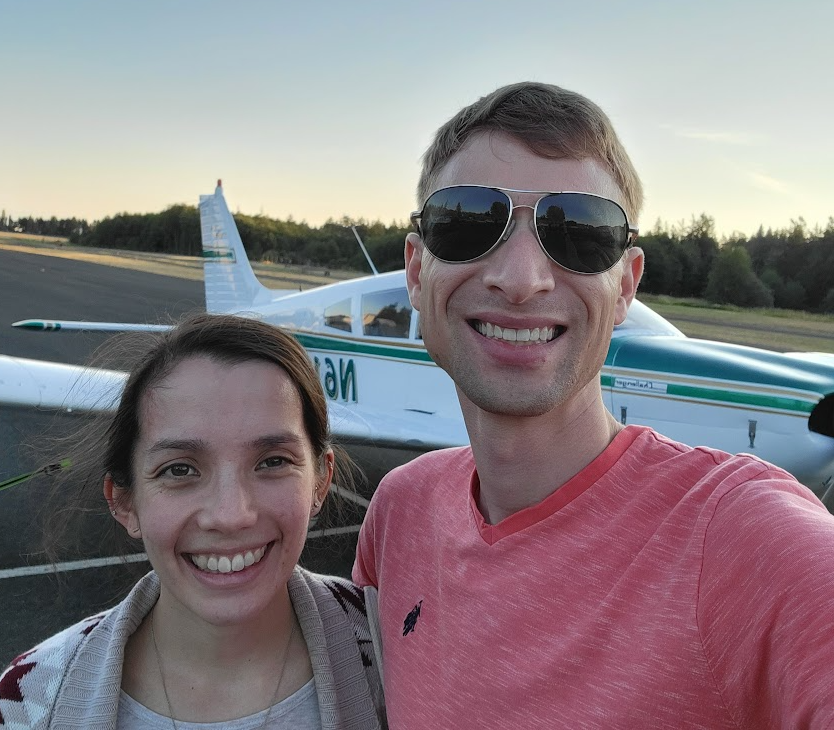
My name is Chris Seto. I’m an embedded firmware engineer living with my wife in Seattle. I’ve been a pilot for the last 13+ years. In that time, I became a CFI and stepped through owning or partnering in four different airplanes.
This blog is my build log for my new RV10 project.
It’s impossible to discuss a new airplane acquisition without mentioning The Mission (TM), so I’ll outline mine here:
I primarily use my airplane because I enjoy flying and being a part of the flying community
I often give rides to non-pilot and pilot friends alike, usually to the San Juans
I have friends at KORS, and I often fly up there to visit them over the weekend
I work in the Bay Area, and sometimes commute from Seattle to KHWD by GA
Secondarily, I use my airplane to personally remain instrument current and capable
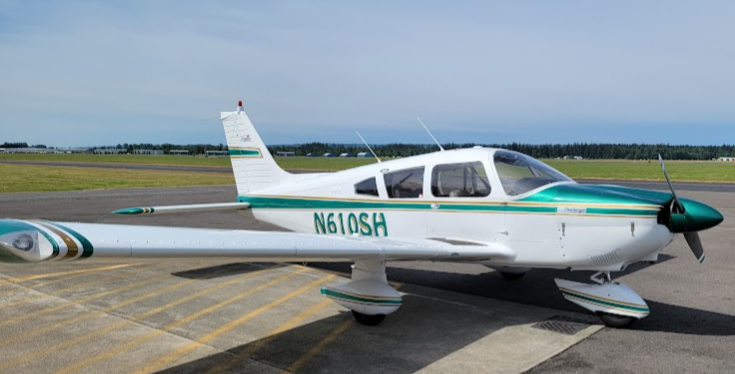
N610SH
My current airplane is a PA28-180, N610SH hangared at Auburn Municipal, about 40 minutes south of where we live in Seattle. I’ve owned 0SH for about 6 years at the time of writing, and honestly, I could never have hoped for a better airplane for this period of my life. 0SH is a Cherokee “Challenger”. The Challengers were only produced between 1972-73 (before anyone tries to correct me that it was only 1973, mine was actually produced in `72). The Challenger is primarily characterized by its Hershey bar wing, but with all of the “modern” amenities of an Archer II (throttle quadrant vs knobs, floor mounted trim wheel vs lasso trim, stretched fuselage, larger dorsal fin, etc). That mix makes it a mix between the old and new generation of PA28s. It seems like people prefer the Hershey bar wing over the taper wing, so this makes the Challenger a desirable type. There weren’t that many Challengers produced, something like 600 exist in the world today, so they are somewhat rare.
0SH builds on the rarity of the Challenger heritage and was extensively refurbished by Command Aviation at KBLI. I know little about the airplane before this refurbishment, but my understanding based on logbooks is that the airplane was in fine condition, but was just outdated and vanilla in terms of amenities.
Command did an incredible job restoring the airplane inside and out. Fully new interior, new thicker windows, noise proofing, one piece windshield, new CNC cut panel with Aspen PFD + GNS530W, every aeromod available installed, new LED interior lights, 3x HID landing lights, Lopresti wingtips… the list goes on.
I bought the airplane at a time when there was minimal froth in the market. In retrospect, I got a /screaming/ deal on it. At the time, it was a lot for an airplane, but I had a feeling that it was worth it. With aircraft prices skyrocketing during/post covid, and a 6 year long history of no real mechanical issues, this turned out to be one of the best purchasing decisions I’ve ever made.
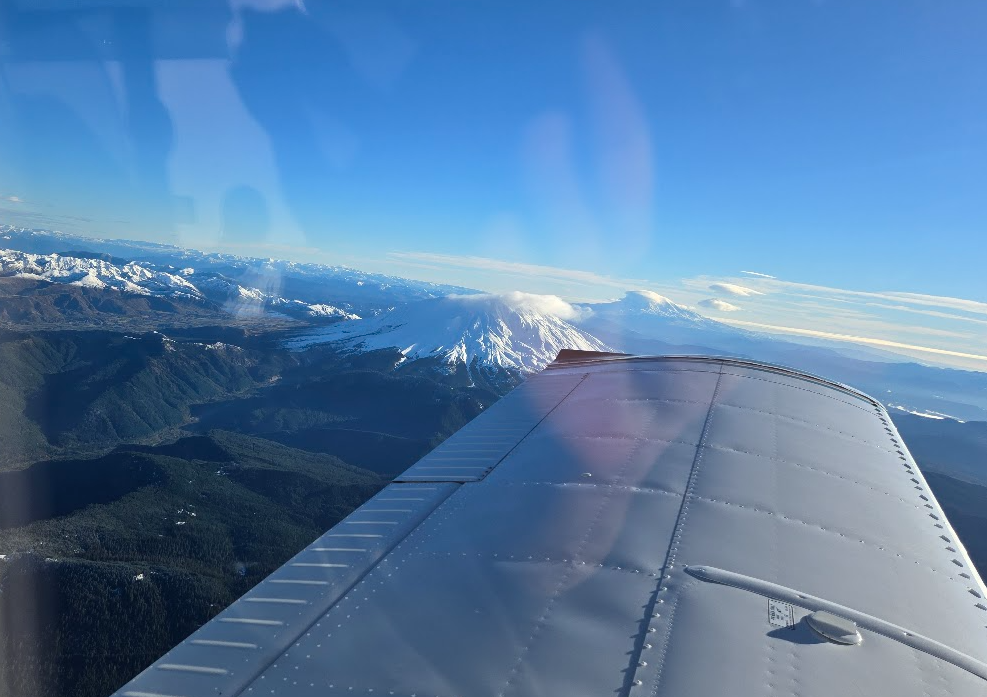
Flying south to the Bay Area
Owning and flying 0SH has been great, but there are a few things that continually bug me:
Truing 150MPH, it’s fast for a FG Cherokee, but my trip to the Bay Area is kind of a slog
Climb performance is not great
It’s an inefficient airplane with probably 10G less fuel capacity than I’d like
Useful load is only about 800lbs
All of these factors combine to take a decent chunk of usefulness out of the airplane. Consider on my trip to the Bay Area, I’m refueling once, and then spending a lot time climbing back up to altitude, taking a bit hit to airspeed the entire way.
0SH in some light IFR
These factors let me to consider the possibility of a new airplane. I had considered buying a new DA40 or Cirrus, but even with the eye watering price of these airplanes, you don’t buy your way out of issues. For example, the DA40 would require a larger hangar (VERY hard to find in Seattle) and even after spending all that money, I’d be left with a underperforming airplane. I could fit a Cirrus in my hangar, but I’d heard too many horror stories about MX issues and long lead times (especially for the parachute repacking).
I had not put serious thought into an experimental, mostly because I knew with my work schedule, it’d be hard to find the time to build the plane. That’s not the only issue. My wife and I live in an apartment, and the airport is 45 minutes away. It’d be a major time commitment to even go to the airport to work on the plane. The last thing I want is a kit which sits around, accumulating minimal progress.
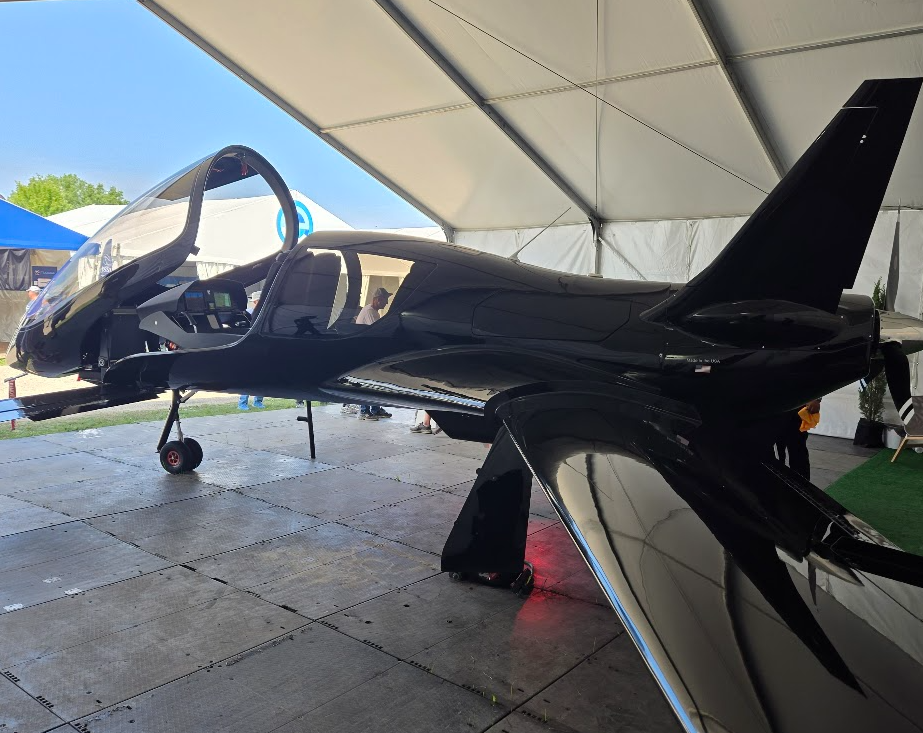
It occurred to me that of the experimentals, both the RV10 and Sling would likely fit my mission if I could get through building one. I was initially strongly considering a Sling, mostly because of their extremely generous build assist program. After flying one in LA at The Airplane Factory, I decided that it seemed like too small of a step up from the Cherokee. It was kind of small inside and while it did go MUCH faster, It didn’t quite go fast enough. I felt like the RV10 was the more senior option in every way, unfortunately, including build difficulty.
One of my few local contacts into the experimental world was Justin, who owns a mechanical engineering consultancy. I called him up and asked what he thought about doing some kind of build assist for an RV10. He told me that this would really be something Ephraim at Experimental Aircraft Services could do justice. I used to be based at AWO, and I had met Ephraim, but only really in passing on several occasions. Funny enough, the first time we really talked was when he helped me drag my Subaru BRZ out of the snow and ice outside my hangar one winter day.
Ephraim seemed excited at the prospect of a build assist RV10, and had schedule time for it. This RV10 project was now viable!
In November of 2024, I begin the first wave of the ordering process. From Vans, I ordered the empennage, QB Fuse, QB wings, and finish kit. From Barret, I ordered a wide deck IO-540 with CAI, roller tappets, dual P-Mag EIS, and B&C alternator primary and standby.
Going the cold air induction path set off an avalanche of parts changes. I deleted the cowl from my finish kit order with Vans and bought a Showplanes cowl/induction system (and composite tailcone, unrelated).
Ephraim recommended Aerotronics for the panel, and I booked production time in October. Ephraim and I formally engaged with a build start time in August of 2025.